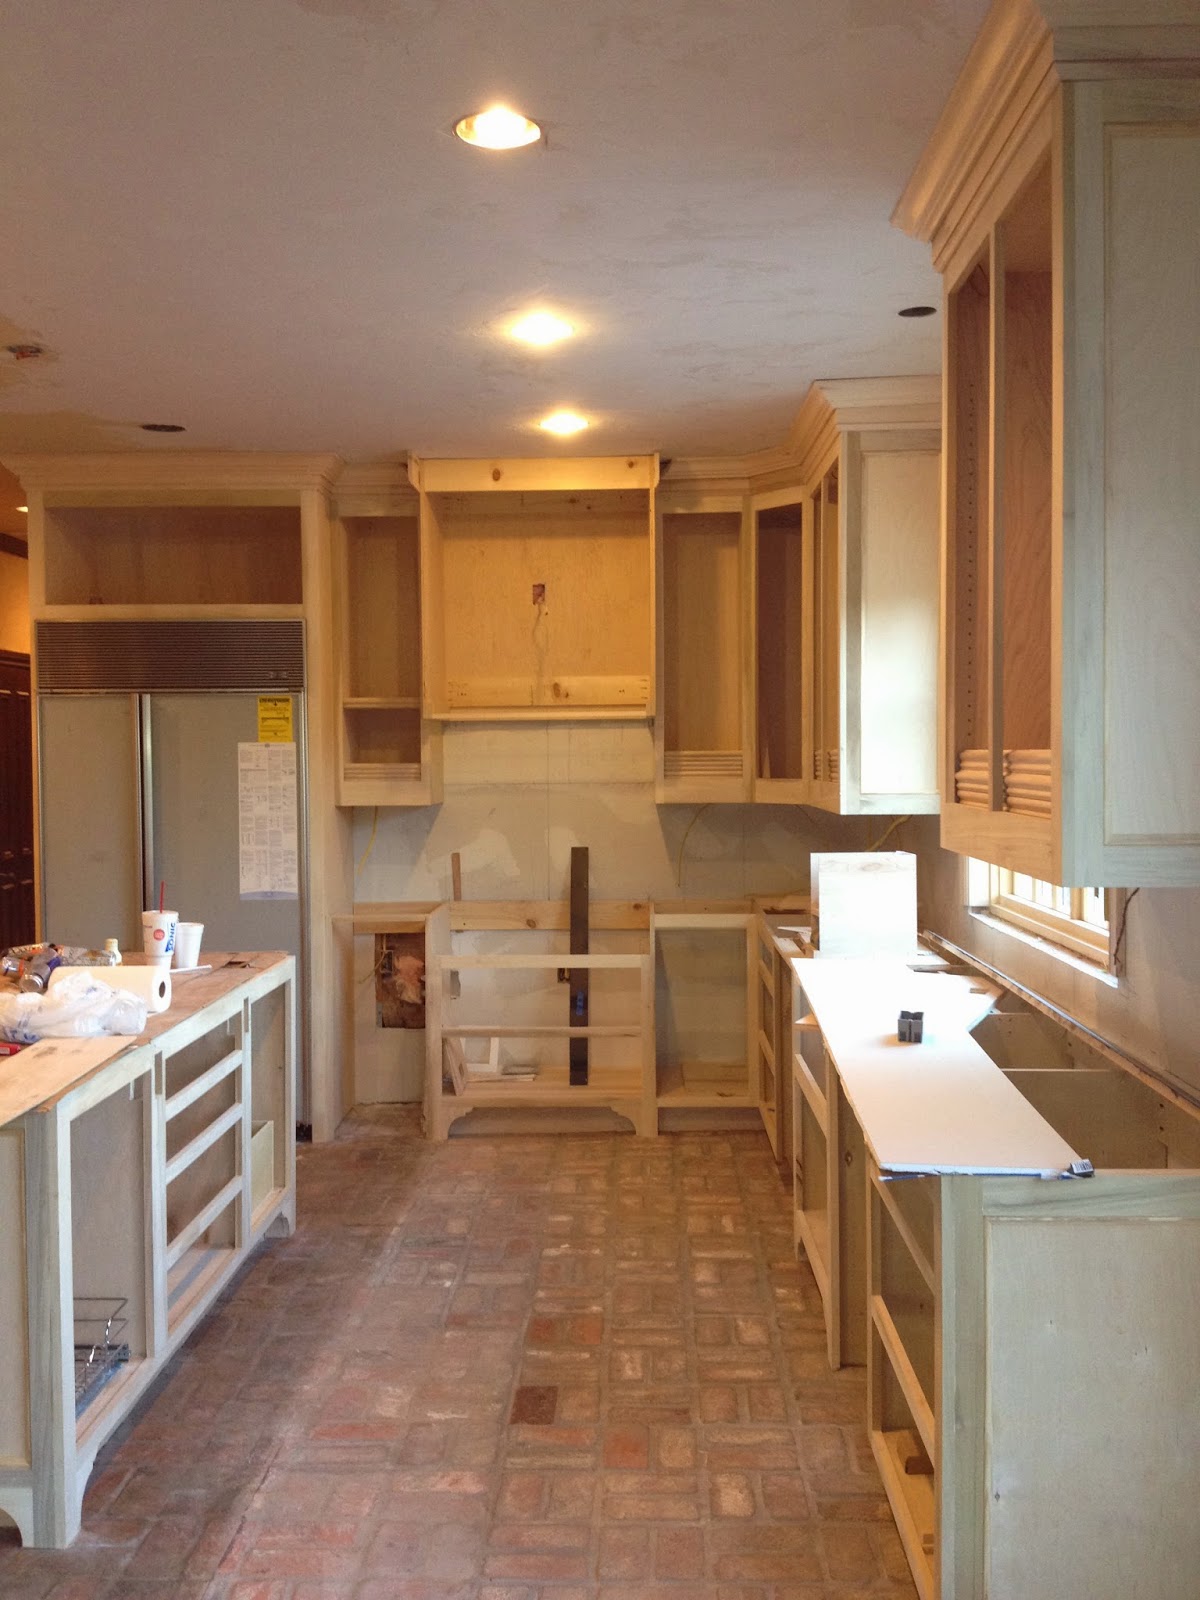
And we have cabinets!!!
New and better drawings are more "to scale" than my last sketches. This is what the carpenter went by as he made every cabinet on site.... for six weeks.
We laid each cabinet out PIECE by PIECE.... This was a full time job for me as I was involved in every tiny aspect... down to how wide I wanted each "style."
So... here is a rookie mistake. I thought I wanted a good 20" from the countertop to the hanging cabinets so I could put cute lamps or trays on my counters... What I didn't plan on was the extra height from putting all of my electrical boxes in the bottoms of the cabinets so as not to disrupt the backsplash. This made the "reach factor" VERY high... like 24-25" high. I hated it. To reach even the lowest cabinet shelf, I was going to need a step-stool. My carpenter laughed when he came back the next day. I explained my dilemma and we decided to just lower the cabinets and add extra moulding at the top, which actually worked out marvelously. I LOVE the thickness of the extra moulding.
Before Lowering the Uppers:
Lowered cabinets and yes, we have cardboard on the island. Remember, we are living here!!
Extra moulding looking fabulous!
Extra moulding on the rest of the upper cabinets! Here you can see on the brick floor what was the "old" kitchen. Darker brick is the sealed brick from old kitchen. We gained so much space. I love having 5 feet between the sink and my island. All of my boys are constantly in this space, so we aren't stepping on each other anymore.
Again, the old island is shown on the brick floor. We ended up cutting one brick worth of wood floor and adding about a foot more of flooring in that direction.
Notice the "feet" on the toe kicks? Each had to be hand scribed to fit against the brick floor. I drew the little design and my awesome carpenter hand made over 20 of these little feet for me.

And the primer is going on!!
Family room before:
Family Room After!!
If I would have known we were about to get hit by tennis ball size hail, I would have saved the expense of painting all of those windows!! The paper wasn't even off the glass when we got hit by the storm.
Next time, I will reveal the completed kitchen!! I can't wait to show you! Then, the laundry room is next!! Wait until you see it!
I'd love to hear from you and answer any questions you might have. Make sure you "follow me" so you don't miss out on the big reveal!!
xo, Emily


I can't believe the sheer amount of work and planning that went into this remodel! I think all of that planning would give me hives. :) It is SO beautiful and well thought out, can't wait to see the finished photos! (PS-send me a quick "Hey" reply so I'll have your e-mail. I wanted to respond to your comment on my blog but didn't have your address.)
ReplyDeleteJennifer! I really need to figure this blog thing out from my cell phone. Email me at elevengables@gmail.com
DeleteHi Emily,
ReplyDeleteI just wanted to let you know that I've nominated you for a Liebster Award! You can read all the details and the instructions on my blog today:
http://www.honeyhavenblog.com/2014/04/liebster-blog-award-nomination.html
Congrats!
Claire Brody
Honey Haven Blog
Oh my goodness! Thank you! I am so excited! and nervous... don't know if I know 11 new blogs. I am going to do some research! Thank you for helping me in my new endeavor! xoxo, Emily
DeleteHow exciting to see your kitchen progress, Emily!!!! This is my dream, after living in a beautiful home that was built by someone else, to design the kitchen in our current home (a work in progress) to suite the needs of OUR family. I love how you were there for every detail, down to where everything would be stored. The new design is lovely and it must have been so gratifying to see all your visions come together!
ReplyDeleteThank you, Lisa!! xo, Emily
DeleteWe have a very similar family room/kitchen combo complete with black built in bookshelves in the family room. How much prep work was involved in painting the family room built ins? My husband is trying to convince me that painting these black built ins will involve an enormous amount of prep work (they are painted with oil based black paint) and if I just prime and paint, they will not hold up well. Just curious as to your experience. I love how the white really opened and brightened both areas! Beautiful.
ReplyDeleteHello! We hired all of the painting out. Painting our dark, dreary woodwork was the BEST DECISION!!! I would do it all over again. We are actually getting bids now for the rest of the woodwork all over the house. My best advice is to hire a quality painter that has references. They need to have experience with lacquer. You will get the best results having the cabinet sprayed (I prefer a smooth finish to a brushed finish). It might run you between $300-500 depending on the size of the piece. There are primers that are made to bond with oil based paints. I hope this helps. Painting woodwork, in my opinion, is not the easiest task. Although, DimplesandTangles.blogspot.com just painted her entire kitchen herself using a sprayer. You might touch base with her too! xox, Emily
DeleteI love your kitchen and wish I had seen it earlier. I have a few questions. How tall are your ceilings? How tall are your cabinets? And what a the demnsions of the window over your sink.
ReplyDelete